If you haven’t checked out Hiring a Longarm Quilter: An In-Depth Guide that I put together with Suzy Williams of Suzy Quilts, you definitely should! It’s packed with lots of information you may find interesting or helpful, hopefully both.
Did any particular project catch your eye? The nature of my job requires collaboration. The following are my photos of quilting on other makers’ tops! Here’s a list of––and links to––makers, patterns, & pantographs.

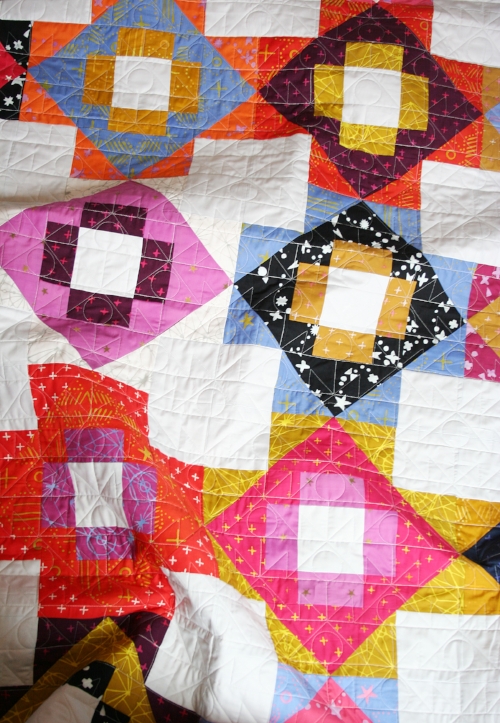
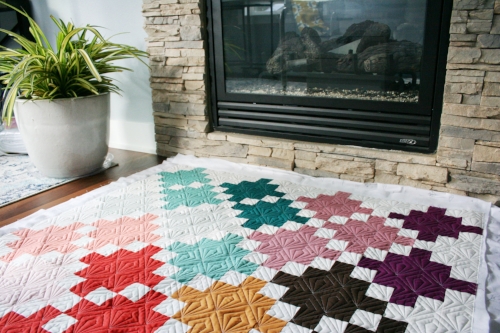
Meghan Buchanan of Then Came June made this patchwork quilt with her 12 year old cousin!
Pantograph: Daisy Tile by Karen Hogan
Fabrics: Alison Glass

Maker: Chelsea Wiehl of The Good Nest
Pattern: Meadowland by Then Came June
Pantograph: Baptist Fans E2E by Three Sisters Fabric


Maker: Lindsey Neill of Pen + Paper Patterns
Pattern: Sweet Treat by Lindsey Neill of Pen + Paper Patterns
Maker: Brenda of Eye Candy Quilts
Pattern: Nene by Eye Candy Quilts
Pantograph: Starlight by Karlee Porter Designs

Maker: Bobbi Dougherty
Pattern: Circle of Friends
Pantograph: Overlapping Crop Circles by Jessica Schick

Maker: Jessie Zeigler (that’s me and you are on my website!)
Pattern: Cora by Jessie Zeigler of Threaded Quilting Studio
Custom quilted by me.
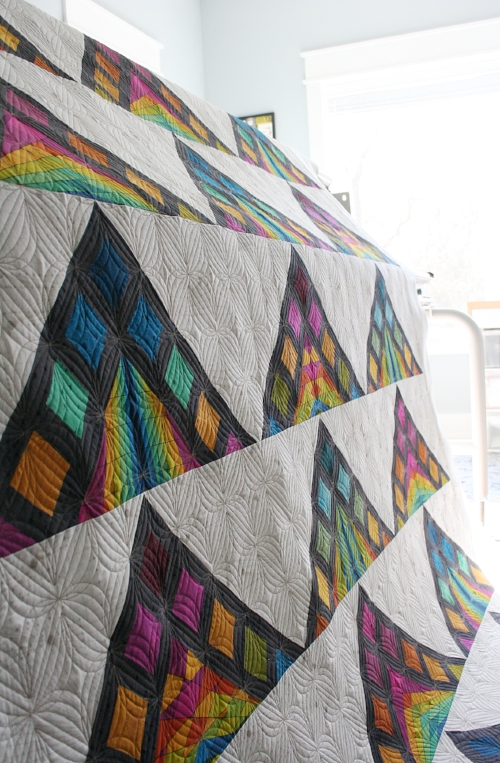
Maker: Meghan Buchanan of Then Came June
Pattern: Meadowland by Then Came June
Pantograph: Lindsey, The Remix (custom made by me)

Maker: Alison Gamm
Pattern: Star Bright Star White by Rebecca Bryan of Bryan House Quilts
Pantograph: Baptist Fan E2E by Three Sisters Fabric

Maker: Stacy Stillions
Pattern: this is the back, but pattern is Mini Modern Heart by me
Pantograph: Baptist Fan E2E by Three Sisters Fabric

Maker: Karen Henderson
Pattern: Sandia by Kristi Schroeder of Initial K Studio
Pantograph: Soho by Sarah Ann Meyers

Maker: Stephanie Williams
Pattern: North Star by Emily Dennis of Quilty Love
Pantograph: Hammersmith by Keryn Emmerson
Maker: Brittany Lloyd of Lo & Behold Stitchery
Pattern: Celtic by Lo & Behold Stitchery
Pantograph: Pineapple Skin by Karlee Porter

Maker: Lindsey Neill of Pen + Paper Patterns, photo also courtesy of Lindsey
Pattern: Vegas Wedding Quilt by Lindsey Neill of Pen + Paper Patterns
Pantograph: Lindsey custom designed by me