Threaded Quilting Studio

modern quilting

Coloring Contest!

Jessie ZeiglerComment

***CONTEST CLOSED***

How about a good ol' coloring contest?!

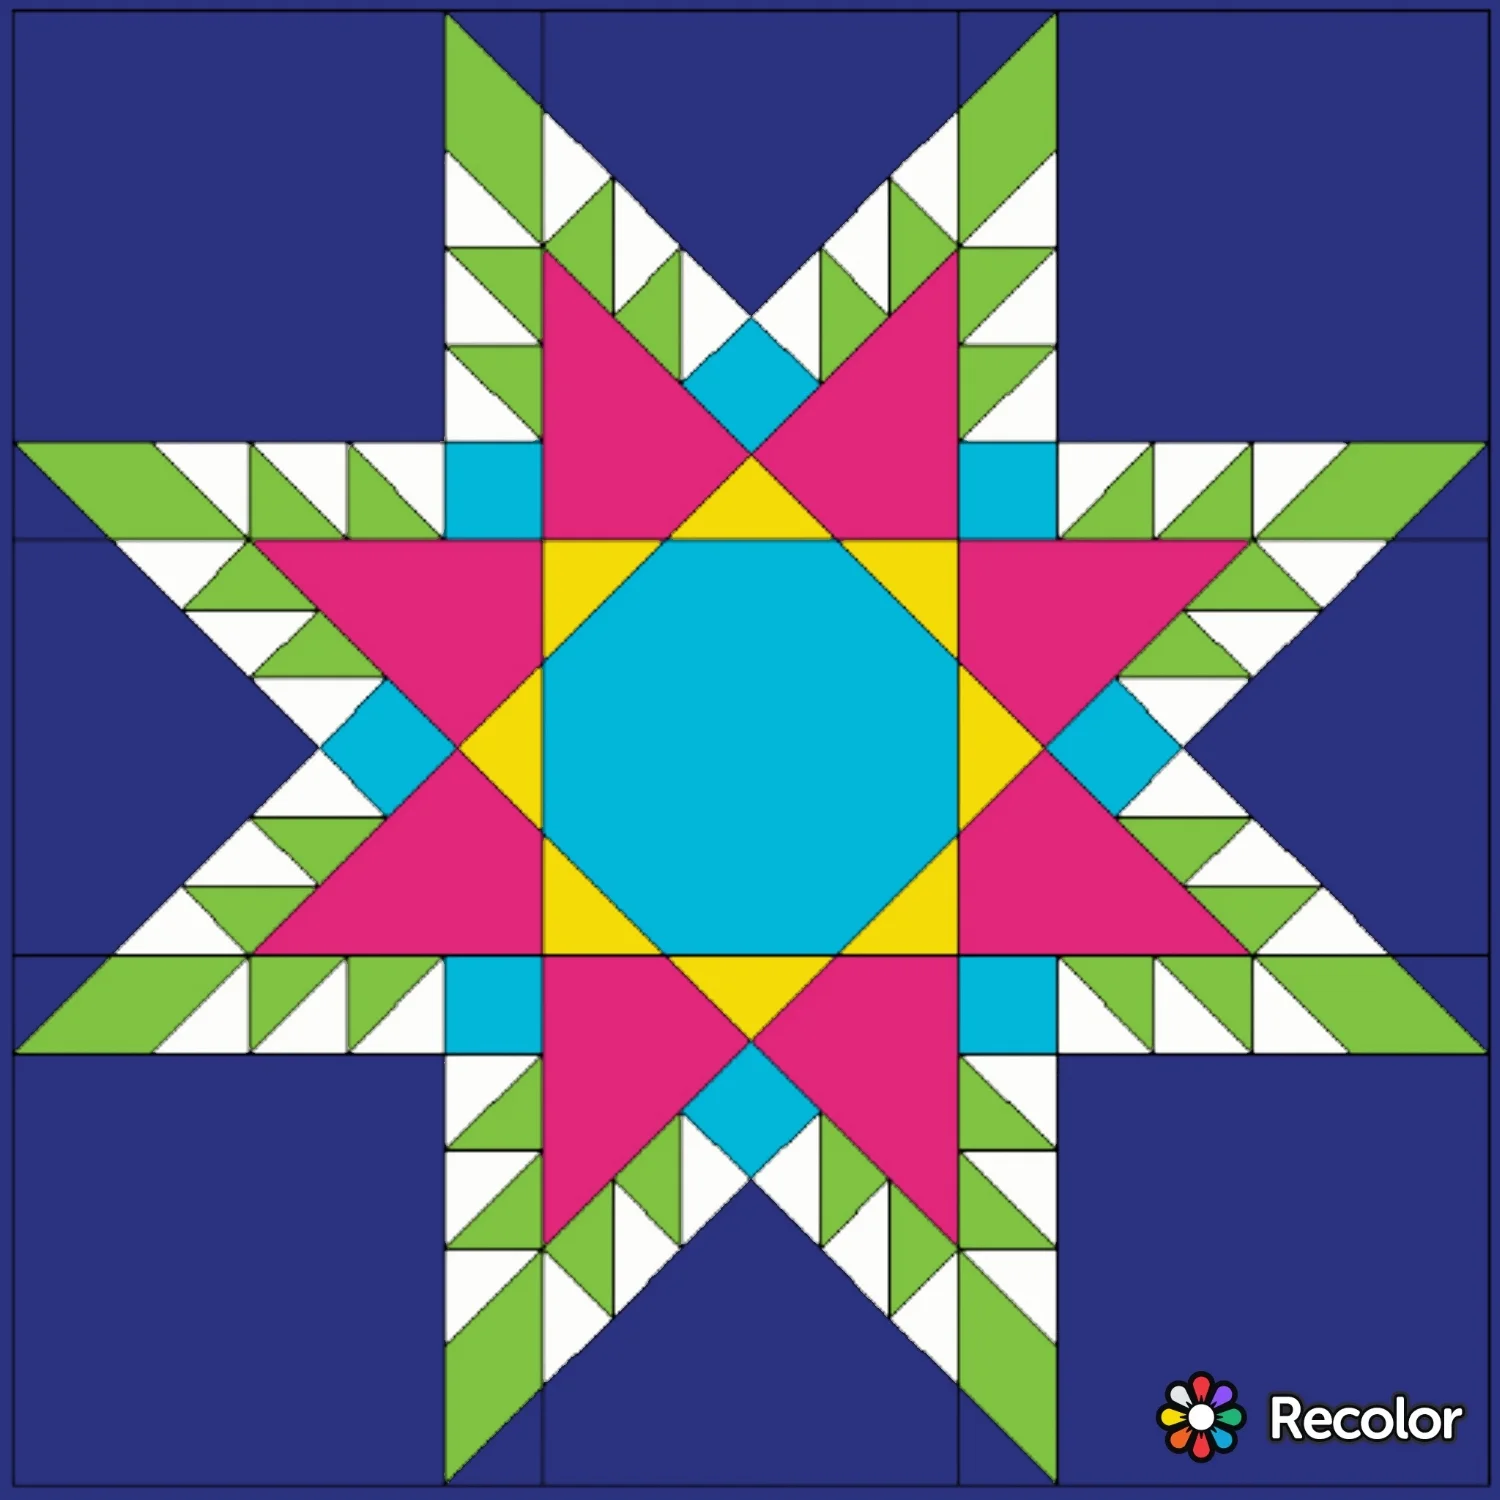
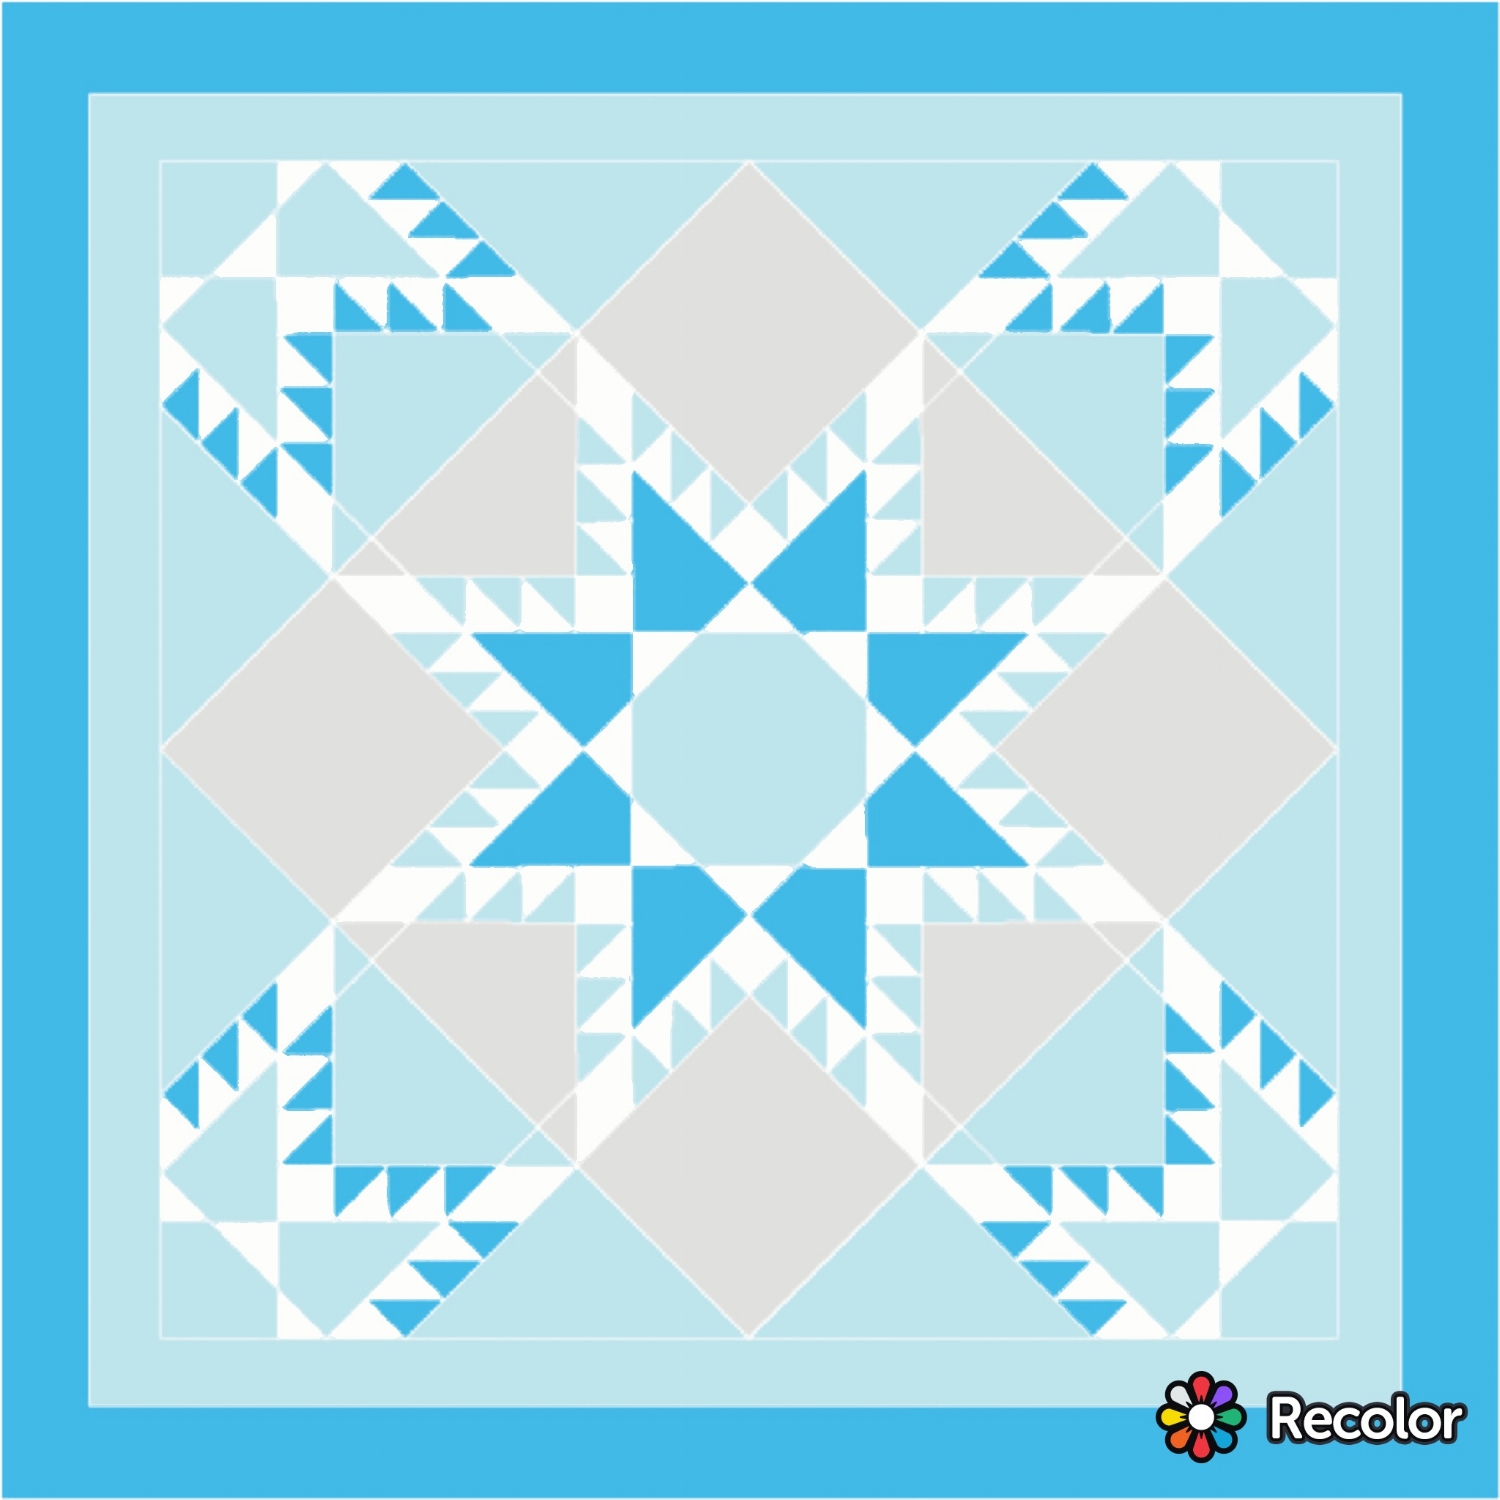
I'm so jazzed about this Recolor app that I want to share the love and excitement with you!

Rules:

1. You must be a follower of @threadedquilting and @mashemodern on Instagram to win.

2. Color one of my quilt patterns and post the finished photo to Instagram with the hashtag #recolorquilts. Please tag me in your post @threadedquilting. Your Instagram profile must be public for it to count. You may color and post as many colorations of my blocks or layouts as you like, just make sure they are separate postings and not a collage. 

You will find a blank coloring file to save to your smart phone or tablet at the end of any listing from my patterns page. If you need help saving the file or knowing which app to download, check out this tutorial for help (there's a video, too).

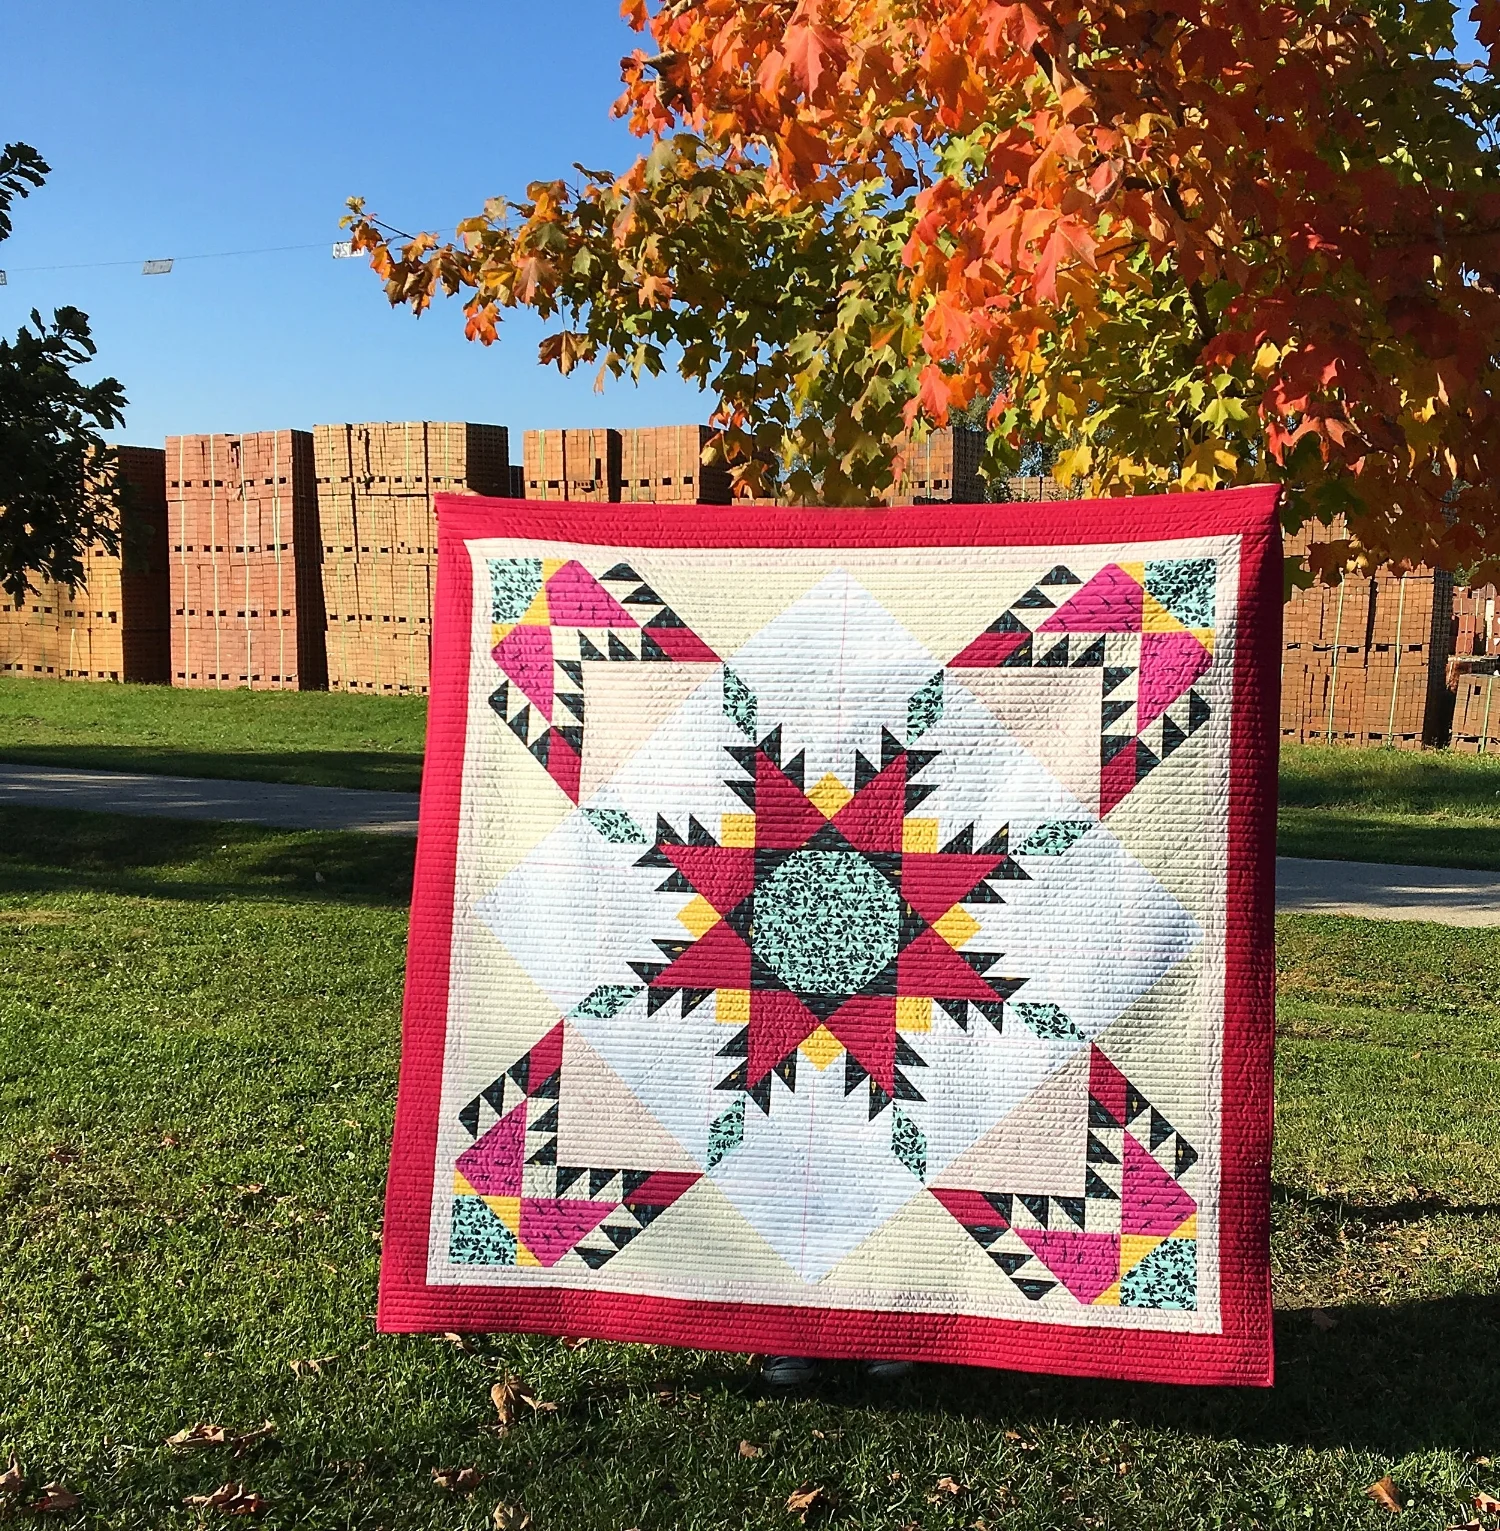
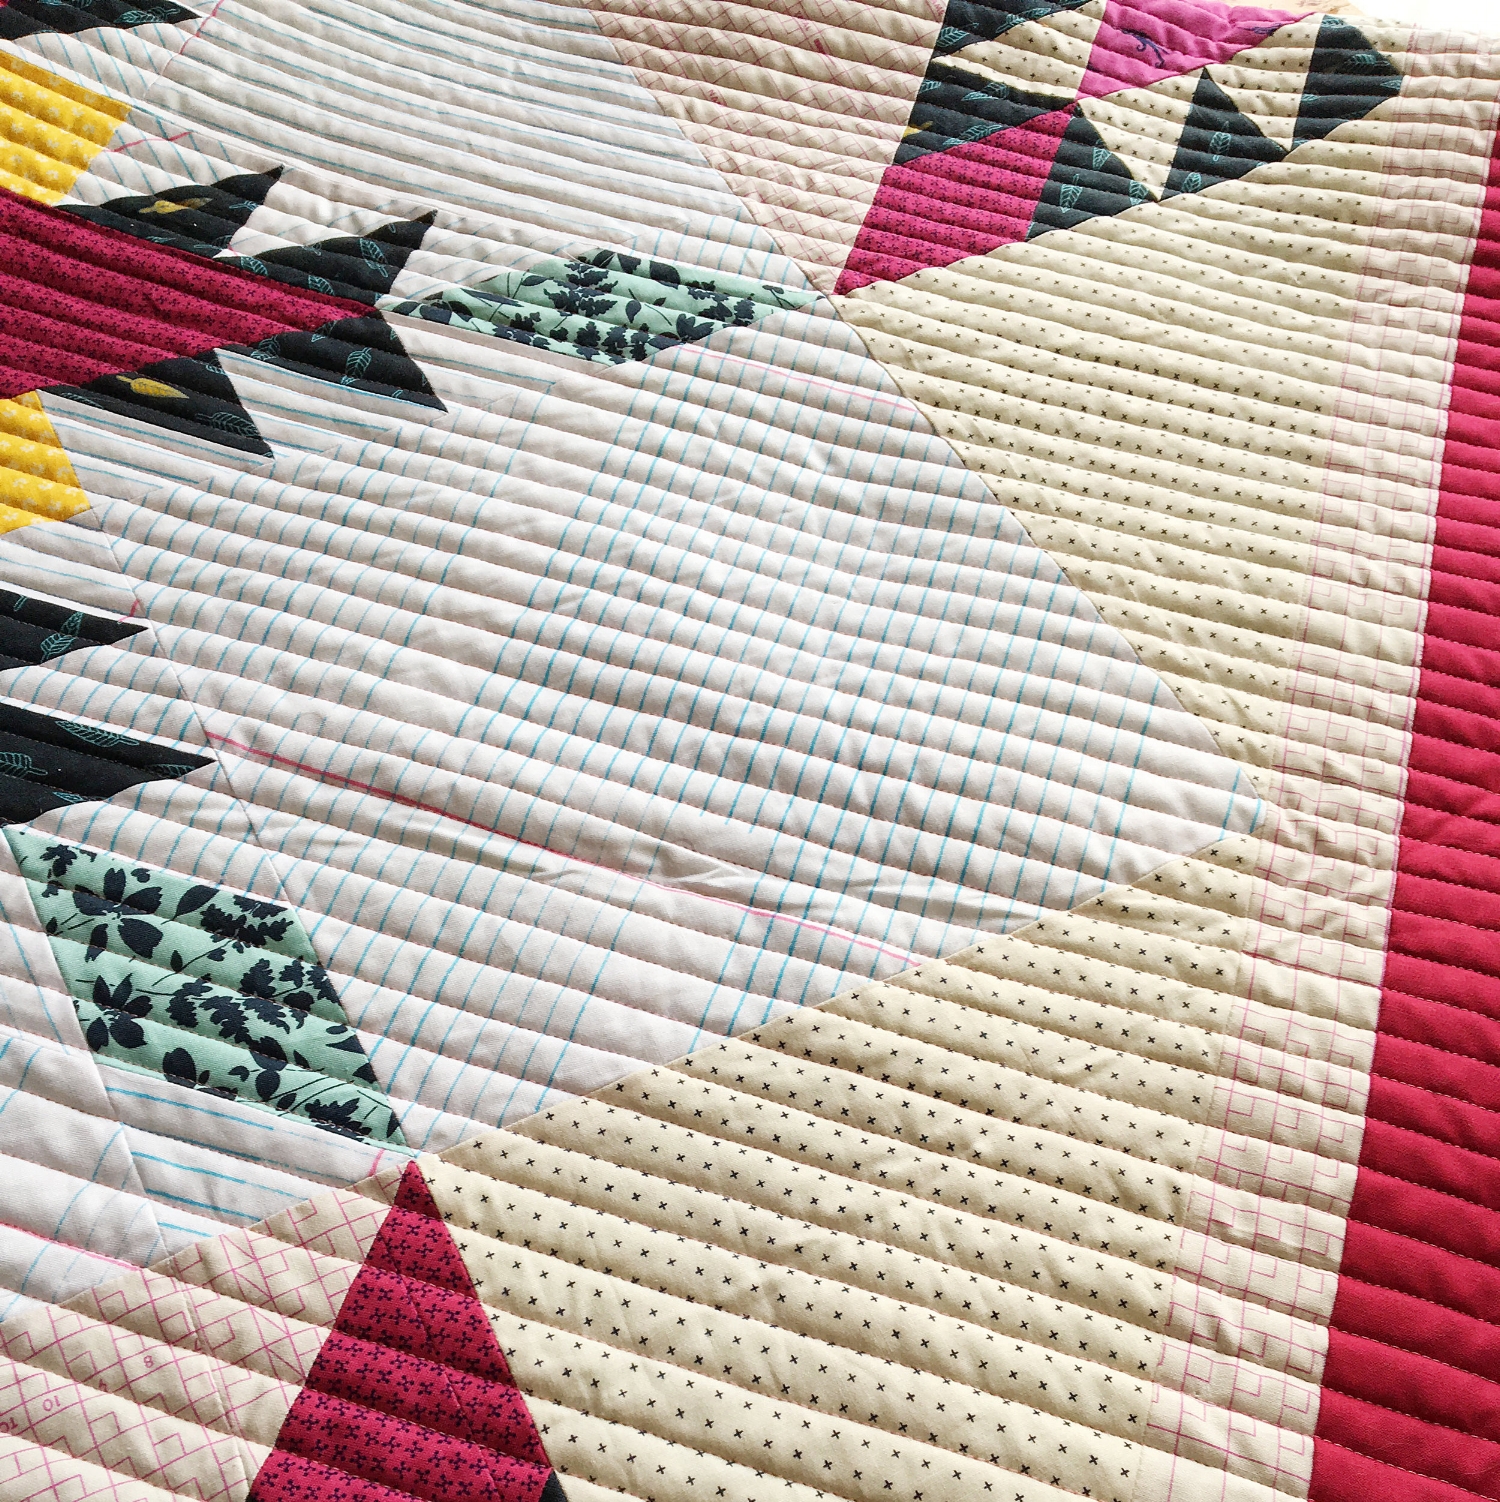
3. On Tuesday, November 15th at 7 pm CST, Kristen and I will choose a winner! The winner will receive a $30 gift certificate to Mashe Modern online fabric shop (she carries Tuuuuuuuula!) and a PDF download of 3 of my patterns: Fierce Feathered Star, Brighten the Corners, and Star Sighting.

(No purchase necessary. Giveaways sponsored by Threaded Quilting Studio and Mashe Modern, not Instagram or Recolor.)

International submissions welcome and eligible! Good luck to all!!

email me @ threadedquilting @ gmail (dot) com or via Instagram with any questions

Using the Recolor app to color a quilt block

Jessie Zeigler10 Comments
No Y Seam Feathered Star: Free, paper piecing, comes in 8", 12" and 16" sizesFierce Feathered Star: $12 PDF download, no paper piecing, no y seams, 20" and 36" block sizes

No Y Seam Feathered Star: Free, paper piecing, comes in 8", 12" and 16" sizes

Fierce Feathered Star: $12 PDF download, no paper piecing, no y seams, 20" and 36" block sizes

A few of the tools I rely on A LOT in my quilt making are my Electric Quilt software and Adobe Illustrator. I absolutely love these tools! They are both pricey, so if you don't see yourself investing in either one of these programs, I have a workaround for you that will help you with selecting colors (fabrics) for your quilt blocks!

I discovered a fantastic FREE* tool to help you color any or all of my patterns! This means that you can play with color first before having to buy or cut any fabric. It takes the printable coloring page to a whole new level!

How to:

Download the Recolor app from the App Store. It's free and has amazing features!

One of the features is the ability to add your own photo to color. So, if you have a photo of a uncolored quilt block or layout, you can import that photo and play around with whatever colors you'd like!

That's where I come in! I'm here for you! You can save the star image below. Some of my other patterns also have these blank coloring files.

coloring page.jpg

Or just play without worrying about making actual quilts, but I'm warning you: it's addictive! :)

A note for Android users:

I've heard from some Android users that when uploading a screenshot of an un-colored block, the app will blur some sections together. If this happens, try downloading the photo instead of taking a screenshot.

 Have fun!!!


*The free version of the app limits the number of pictures you can import to color per day. New importing "allowances" are renewed the next day. Unlimited importing power can be purchased if so desired.

UPDATE: MAY 2019

I will occasionally get emails or comments that the app is not free. Each time I delete my app and download it again and I’ve always been able to access the features for free, I’ve never paid for anything. If the app asks if you want a free trial period, simply “x” out of that window to close it and continue using the app. Over the years, the number of ads has increased and I’ve noticed it’ll make you watch a video ad to unlock certain features. It’s annoying, it’s designed to point you toward paid versions, but it’s still a workable free solution if you need it.

Watch this video for the step-by-step tutorial:

This lap quilt layout is two 36" Fierce Feathered Star blocks arranged an on-point settling.

This lap quilt layout is two 36" Fierce Feathered Star blocks arranged an on-point settling.

Fierce Feathered Star straight set quilt layout

Jessie Zeigler2 Comments
blog post 1.jpg

If you're keeping track at home, this is the second Fierce Feathered Star quilt I've finished so far. :) The first one has a very different look.

What better way to test measurements and instructions than making the pattern NINE times? I felt like I got the process down to a science while making the last few blocks.

To keep the making more interesting, I decided to pick a different combo of blues and greens each time. I really didn't know how or IF the quilt would have a cohesive look when I was done, but it was interesting! I think the result is fun and more interesting than if I would have used the same color scheme again and again, which honestly felt like the safer choice to me.

In other words, this is me being dangerous! :)

I did make some color decisions before beginning the first block. I decided that I was going to use the same gray background fabric throughout. I also decided I would use just 3 "main" (aka non-background) fabrics for each star. The last thing I kept consistent was the use of the white fabric as a secondary background in each star.

Once I made the aforementioned color decisions, I sat down and made each block one at a time, I worked at a pace of about one star per day. Once I had all of the blocks done, I arranged and rearranged them on my design wall until I was happy with the color distribution across the top as a whole.

I wanted each block to stand out on its own. For that to work, I decided that there needed to be some space between each block. The sashing strips and borders helped to make each star independent and pronounced.

I'm attaching a diagram of how I add sashing strips and borders to quilts.

For this quilt, I cut four sashing strips and positioned one on each side as shown in the diagram above. Then I sewed one sashing strip to the first two blocks and two sashing strips to the last block. Next, I sewed those sashing strips and blocks into a row. Then, I repeated that process until I had 3 rows.

After my rows were complete, I pieced and cut long border/sashing strips exactly to the measurement of the rows. Four were needed for this quilt and btw: both the vertical and horizontal sashing strips are the same width. 

As far as handling bulk, I find it easiest to pin the long border strip to one row and then seam. Repeat until all long sashings are sewn. One row will need a long strip sewn to both the top and bottom edges.

Then I sew the rows (with sashing attached) to each other to form the quilt top.


Interactive coloring! From a smart phone, save one of these blank diagrams for coloring in the Recolor app. Click here for full instructions in this tutorial (with video).

How would you color your Fierce Feathered Star?

As we all know, the quilt isn't done when the top gets assembled!

I can't leave you without giving you a little more about the quilting, it's my favorite part!

I decided to quilt lines within the stars. Because there is already a lot going on in the piecing and in the background quilting, I wanted the stars themselves to have strong-but-uncomplicated contrasting lines. Every other star has diagonal lines and its neighbor has vertical and horizontal lines. I used a marker (the pink air-soluble marker on my list of quilting tools) to draw the lines first and then used a longarm ruler + baseplate extender to actually quilt the lines out.

Last but certainly not least, let me talk about the background quilting! I have a video tutorial with step by step instructions on how to draw this out, it's called paisley feathers. You can even print your own PDF tracing sheet to draw along with me as I walk through the process.

Fierce Feathered Star layout option

Jessie Zeigler1 Comment
This is my Fierce Feathered Star pattern shown in the 36 inch version (center) with another 36 inch star cut apart and added to the corners. Including the borders, this finished at 60" x 60".

This is my Fierce Feathered Star pattern shown in the 36 inch version (center) with another 36 inch star cut apart and added to the corners. Including the borders, this finished at 60" x 60".

When I decided to figure out how to expand the feathered star pattern that I love so much, I knew I wanted to go BIG!

When I created the free No Y Seam Feathered Star paper piecing pattern, I explored the idea of going small. The 8" block is a thing. Eight inches doesn't seem that small... unless you're talking about fitting 100+ seams in that space... Then it seems slightly cramped. :) Super-cute, don't get me wrong! But super-cute AND tiny. Don't worry, if you are interested in downloading the pattern, it also comes in a 12" and 16" version.

I loved the idea of creating one huge star as a stand-alone baby quilt. Baby quilts are my absolute favorite quilts to make! Have I mentioned that yet today? If not, baby quilts ARE the best. Exploring a new idea without a significant investment in materials and time is SO appealing to me. I mean obviously it's still more expensive and time consuming than buying a baby gift from a registry like a normal person. But, compared to what it takes to make a large bed quilt... it's a walk in the park!

This was my original vision for the 36". I was just going to quilt it and bind it. It would have been fine. But then I had another idea...

This was my original vision for the 36". I was just going to quilt it and bind it. It would have been fine. But then I had another idea...

Then I had this crazy thought that making only two of the huge blocks would cover significant "real estate"... but how would that layout work? A 36" x 72" masterpiece? Hardly! But what if I *shudder* cut up one of the blocks? If I set my main block on-point and then placed the cut-up star pieces in the corners? What would happen?

This is what happened. :( I didn't realize that what I needed were triangles and not squares. Clearly, my spatial reasoning skills leave something to be desired. I'm glad I used my brown scraps for this prototype, I didn't feel bad about cutting it up. Sorry, brown, it's not you, it's me.

Oddly enough, I got more confidence after I messed up the first block. I thought again and again about it and decided that cutting up a second block would work. 

I took this photo moments before I cut it up. I needed proof of its beauty in case it turned into a painful memory.

I took this photo moments before I cut it up. I needed proof of its beauty in case it turned into a painful memory.

I worked up the nerve and cut into my "good" block! I used a 24" ruler and aligned it exactly from the corner of the block to my first "reference point" which was intersecting the "capstone square" in its path. And then I aimed for my next patch (a triangle accent) to bisect. The cutting became easier after that initial slice was made. I kept going until it was in two pieces. I had to carefully reposition the block and my ruler several times to do a good job without stretching the bias edges I created. And then I cut diagonally in the other direction to get my four triangle corners.

One in-tact Fierce Feathered Star block set on-point.

One in-tact Fierce Feathered Star block set on-point.

One Fierce Feathered Star block cut diagonally into quarter square triangles.

One Fierce Feathered Star block cut diagonally into quarter square triangles.

Triangles placed in the corners around the main block.

Triangles placed in the corners around the main block.

The biggest question mark for me while I was piecing the top together: How bad are my points going to look?! Because I'd worked with on-point settings in the past, I knew that the setting triangles had to be longer than the main blocks in order to preserve the points. Since I was starting with two blocks the exact same size, I knew I was going to have blunted points when I seamed it back together, I just didn't know how much it would bother me.

If nothing about this photo bothers you, chances are you too can live with the drawbacks from this layout method. :)

If nothing about this photo bothers you, chances are you too can live with the drawbacks from this layout method. :)

In the end, I realized that it didn't bother me at all! The ease at which you can make two identically sized blocks and come up with this interesting lap quilt layout was much more appealing than a few triangle point "nubs". It's made even less noticeable when using the same or similarly-valued fabrics. 

The blunted tip is definitely minimized by using similarly-valued fabrics. Using the same fabrics would be even less noticeable.

The blunted tip is definitely minimized by using similarly-valued fabrics. Using the same fabrics would be even less noticeable.

I knew I would need some kind of border to stabilize all of the outer bias edges. Borders are something I don't generally add if I can help it. In this case, the borders were necessary and I added two: one to blend in with the main part of the quilt top and one to frame the whole thing. I was surprised by how much I liked the bold pink (almost red) color along the perimeter. I decided to use the same fabric for the binding. 

The arrows are pointing to the other "casualties" of this method and losing some of the points in the seam allowance. More importantly, the actual star tips are still nice an pointy!

The arrows are pointing to the other "casualties" of this method and losing some of the points in the seam allowance. More importantly, the actual star tips are still nice an pointy!

Overall, I'm so happy with this experiment! I'm glad I took the risk of cutting up a pretty block. The reward was pretty sweet. One last thing: How adorable is that gingham for the back??? Soooooo adorable. I would have also accepted "very adorable" as an answer. ;)

If you are thinking about making this quilt or using the Fierce Feathered Star block in your own quiltmaking, you can download the pattern here. You'll get detailed (and illustration-heavy) instructions for making either the 20" or 36" block, in addition to a whole video series demonstrating every step! There's no paper piecing and no y-seaming! :) 

Sew Mojo Series #1

Jessie Zeigler4 Comments
IMG_1832.jpg

I just finished up an awesome creative exercise and wanted to share some thoughts I took away from the experience.

Let me back up a sec. Last month I attended the Sew Pro convention in Chicago and met new quilting friends. [Come for the info, leave with friendships!] One of the topics of conversation that weekend was how my Sew Pro roomie Megan (find her on Instagram @citystitches) had lost her sewing mojo. She's got a great excuse, btw. She's busy planning her wedding, and because of that, hadn't sewn in months.

Listening with interest was Suzy Williams of Suzy Quilts. The question of recapturing that elusive sewing mojo conjured up an idea. A few weeks later, Suzy created this pattern series (with three more mini patterns to come) to help Megan and others bring back that sewing mojo! 

Find the pattern here in Suzy's shop. And definitely check out how this group of amazing quilters (and me!) took this pattern and freaking RAN WITH IT! 

To be candid: I have sewing mojo in spades. SPADES, I tell you! :) With ideas constantly in my brain and a full to-do list, I wasn't sure if I wanted to introduce a new project. I wanted to be up-front about that in case you too feel like you don't belong in the "lost my sewjo" camp.

In the end, my curiosity gave way to my schedule. Also? I loved the idea of challenging myself to do something out of the ordinary. And let's face it, the whole thing took less than a day. Anyone can give themselves a day to play!

I am so glad I did it!

Here's what I learned:

1) Quilting is art.

In my heart, I knew that. I think that because it's also my everyday, I can easily forget that fact. Putting textile art in a frame makes it more legit. That's just how it is. Putting it on the wall makes everyone else take notice, too. ("Mom, you DID that?!")

2) Sewing mojo doesn't have to be lost to be found.

Trying something new on a small scale was so fun and freeing. Even though I wasn't in a rut, I know that this simple exercise will affect how I approach future quilts.

3) I love quilting.

I will over-quilt every time I get the chance. It's who I am. In this case, I used my domestic sewing machine, my longarm and my own God-given hands to saturate this mini with quilting stitches. 

4) Adding hand quilting embellishments was my favorite part, "hands" down.

A+++++++ will do again. This was my first time! I "cheated" by hunting and stabbing each stitch, but that's okay with me, I love the look. This topic might be its own post at some point in time. :)

5) Editing is allowed in improv. 

My first design was this:

I had to chuckle when I took a photo of my work in progress and discovered my piece was almost exactly the size of a vinyl record. I selected my fabrics with our music room in mind as being the final destination for my mini quilt. While the size was fitting for the theme of the room, when I discovered that I already owned three 10" x 13" picture frames, I decided to edit my piece to fit the frame. Instead of starting over or chopping off entire sections, I ripped out a few seams, trimmed the strips down in width and seamed them together again. I am so much happier with the "skinny", framable version.

"Compressed" after editing, but just as punchy:

6) It doesn't have to be complicated to be really valuable.

In addition to this sentiment being my main take-away from Sew Pro, this idea is also true as it relates to this pattern. This month marks the 11th anniversary of taking my first quilting class! Yet this totally accessible-to-anyone pattern/exercise stretched me and taught me so much.

And I have new wall candy!

Before I let you go, I wanted to share how I hung my framed mini quilt. This is one of my favorite tips (thanks, Mom!):

Straight pins (this is a glass head pin) are amazing "nails" for hanging things on drywall. You'd be surprised at how strong they are! It does take a lot of constant pressure to push them into a wall (watch out for studs!) but once they are in, they can support most standard frames. 

I love hanging frames this way because it doesn't require any tools and they leave the tiniest of holes if you should change your mind (see photo below). It's a wall freckle, for goodness sake!

Be careful not to use so much "sudden" force that you bend the pin. And seriously, you have to press so hard and steady that it's difficult to place more than a of couple pins at one time. Your thumb will get sore!

I'm looking forward to seeing what Suzy has up her sleeve for the next minis!  And of course, putting more tiny holes in—and art on—my walls.

Brighten the Corners block construction

Jessie ZeiglerComment

I played around with the construction of this block many ways before settling on the foundation paper piecing templates that ended up in the pattern.

One thing that I ask myself when designing quilt blocks and their construction is: How can I get accurate and consistent results? Recently, paper piecing has become my answer for many such designs. If I can avoid any "weird" sewing, I will! Of course "weird" sewing is subjective and many find paper piecing in itself weird! :)

Check out this 29 second video I put together showing how a Brighten the Corners block comes together so you can see for yourself the easy sewing methods:

I'll be honest, I made this block just for this video demonstration, but now I can't stop at just one! I love these fabrics too much and so now am working on a quilt. What can I say? I find this process very satisfying!

This time, I'm going to play around with taking my papers out after each block is constructed but before I sew the blocks together in the quilt top. I love being able to perfectly align the blocks with paper still in, pin, and sew on the solid template lines to ensure perfect points. But, the downside of keeping the papers in through whole quilt top construction (in my opinion) is that paper removal feels more tedious... maybe because there actually are more seams through the paper at that point. But, I'm pretty confident in my 1/4" seam, so I should be able to get good points without the paper for reference.

Let's be real. There is also that element of, "I just finished the last seam of this quilt top and now I'm DOOOOOOONE!" Rather than: "I just finished the last seam of this quilt top and now I have hours more of paper removal!" 

I still like to experiment to find the methods most enjoyable for me. It definitely won't be the same for all of us, but that's the beauty of having options and sharing those findings with people who speak your language, if you know what I mean. ;)

If you are interested in buying the pattern and trying this block out for yourself, it's available here: